


Why Is an Industrial Fan Making Excessive Noise?
Oct 15, 2026
An industrial fan does not have to be silent, but a sudden increase in noise, a new rattling sound, or persistent high-pitched whistling should not be treated as normal operating noise. These changes can indicate a mechanical fault, unstable airflow, poor duct connections, or vibration being transmitted through the supporting structure.
The difficult part is that the sound heard near the fan is not necessarily generated by the fan itself. A noisy duct, loose access panel, vibrating support, or poorly positioned inlet elbow can make an otherwise serviceable fan installation sound much louder.
Before replacing the fan or installing a silencer, identify where the noise originates. The following checks help maintenance teams distinguish aerodynamic noise from mechanical and structural problems.
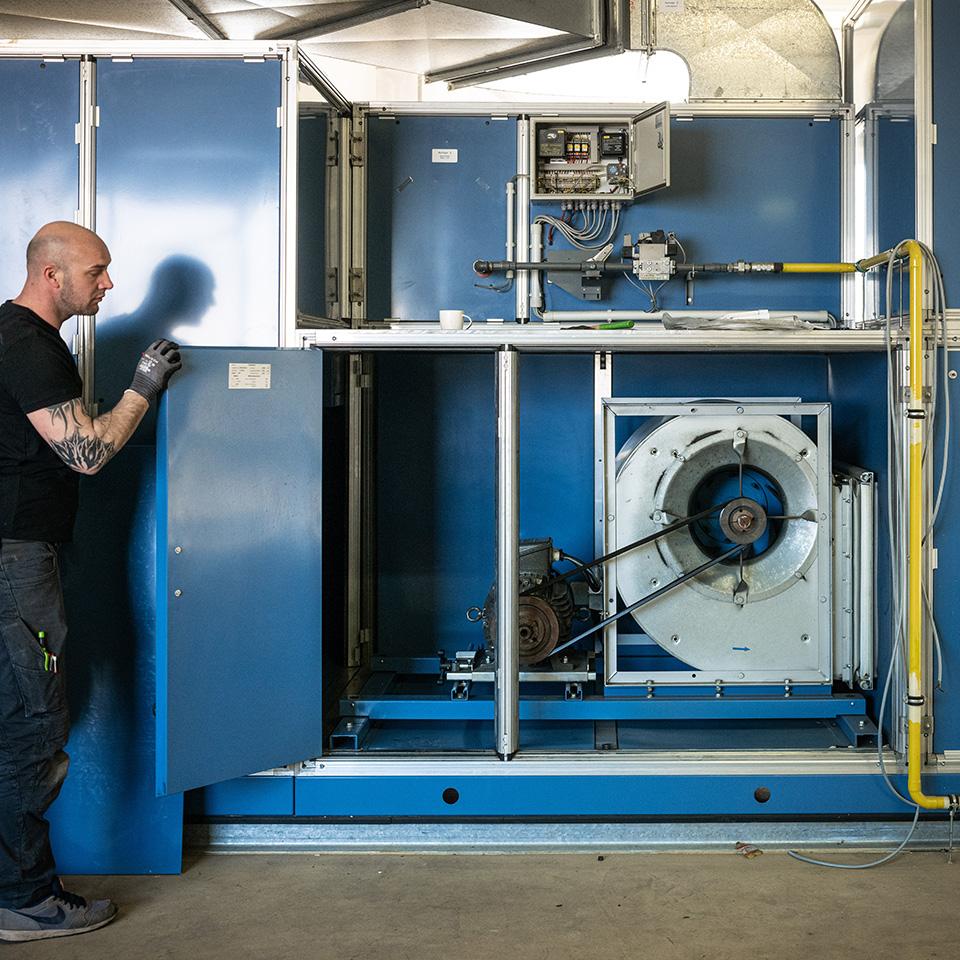
1. Air Turbulence at the Fan Inlet or Outlet
A common source of excessive industrial fan noise is turbulent airflow around the fan connection.
Centrifugal fans perform best when air enters the impeller evenly and leaves the outlet without severe flow disturbance. However, installation space is often limited. An elbow, reducer, damper, or abrupt duct transition placed too close to the fan can create uneven airflow or swirl.
The resulting turbulence can produce a rushing, roaring, or fluctuating sound. It may also reduce airflow and increase vibration.
Pay particular attention to:
A sharp elbow immediately before the fan inlet.
An uneven or abrupt transition between the duct and fan opening.
A partially obstructed inlet or outlet.
A damper positioned where it creates strong local turbulence.
Poorly designed discharge connections.
How to check: Compare the noise near the fan inlet, outlet, and downstream duct. If the sound becomes more noticeable around a particular fitting or duct section, investigate the local airflow condition rather than assuming the impeller is defective.
The practical correction may involve improving the duct transition, relocating an elbow, removing an obstruction, or changing the damper arrangement. Adding a silencer without correcting severe turbulence may leave the underlying problem unresolved.
2. Impeller Imbalance or Material Build-Up
An unbalanced impeller can cause the fan assembly to vibrate as it rotates. This vibration is transmitted through the shaft, bearings, casing, base, and connected ductwork, producing a noticeable humming, rumbling, or mechanical noise.
In industrial applications, imbalance can develop after installation or during service.
Typical causes include:
Dust or material accumulating unevenly on the blades.
Corrosion or erosion changing the impeller's mass distribution.
Blade deformation after foreign-object impact.
Missing or damaged balance weights.
Incorrect impeller installation or positioning.
This is especially relevant to dust collection, cement processing, woodworking, and other applications where particles may enter the fan.
How to check: Inspect the impeller for uneven deposits, damaged blades, corrosion, and signs of rubbing. If the fan vibrates strongly at operating speed, vibration measurement can help determine whether rotational imbalance is a likely cause.
Cleaning may be sufficient when deposits are responsible. A damaged or corroded impeller may require repair or replacement, followed by appropriate balancing. Do not attempt to add balance weights by trial and error.
3. Worn Bearings or Insufficient Lubrication
Bearing-related noise often sounds different from airflow noise. A damaged bearing may produce a continuous growl, rough rumbling, squealing, or irregular mechanical sound.
Possible causes include:
Insufficient or unsuitable lubricant.
Excessive lubrication.
Dust or moisture entering the bearing.
Bearing fatigue or surface damage.
Excessive belt tension.
Shaft misalignment or incorrect installation.
A common mistake is to assume that every noisy bearing needs more grease. Over-lubrication can also increase bearing temperature and cause problems, particularly when the lubrication procedure does not match the bearing manufacturer's requirements.
How to check: Listen near the bearing housing and compare the sound with the motor and fan casing. Check bearing temperature and vibration trends, and inspect lubrication condition according to the maintenance instructions.
If the bearing produces a persistent abnormal sound or shows increasing vibration and temperature, plan a proper inspection. A bearing that is already damaged will not be restored by adding lubricant.
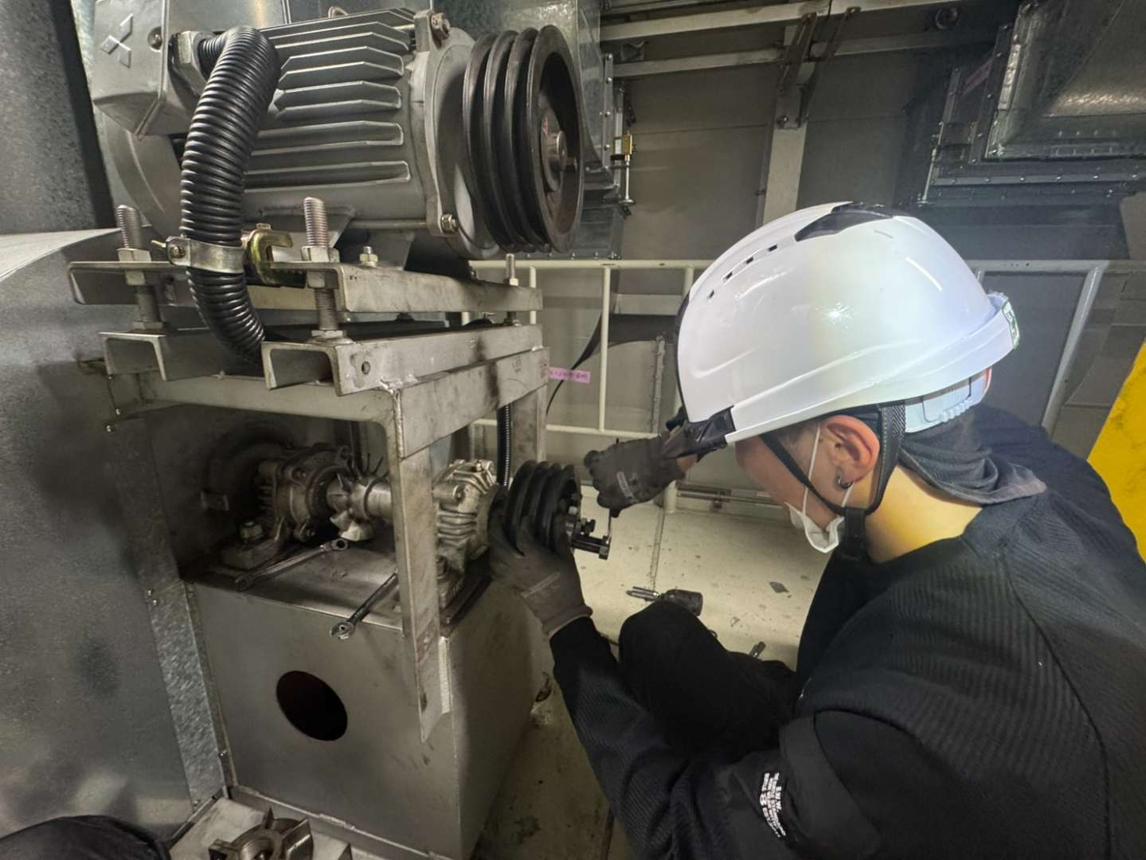
4. Loose Belts, Pulleys, Couplings, or Fasteners
A rattling, knocking, squealing, or intermittent clattering sound may come from loose or worn drive components rather than the fan wheel.
For belt-driven fans, common problems include:
Insufficient belt tension causing slipping or belt slap.
Excessive tension increasing bearing loads.
Worn or damaged pulleys.
Misaligned motor and fan pulleys.
Uneven wear among multiple belts.
For direct-drive or coupling-driven fans, inspect coupling condition, alignment, and fastening hardware.
Also check the fan mounting bolts, bearing housing bolts, access doors, inspection covers, guards, and other accessories. A small loose component can create a surprisingly noticeable rattling sound.
How to check: With the equipment isolated and secured against accidental startup, inspect the drive assembly and fasteners. Check belt condition and alignment against the manufacturer's requirements. Do not inspect or adjust moving belts while the fan is running.
5. Fan Casing, Base, or Ductwork Is Resonating
Sometimes the fan's mechanical condition is acceptable, but the installation amplifies its operating noise.
A fan produces periodic forces during rotation. If the supporting structure or connected ductwork responds strongly at a particular frequency, vibration can be amplified and heard as humming, booming, or low-frequency noise.
Common installation-related causes include:
Insufficiently rigid support frames.
Loose foundation or mounting bolts.
Inadequate vibration isolation.
Ductwork without sufficient support.
Rigid duct connections transmitting vibration.
Panels or guards vibrating against nearby components.
A useful clue is that the sound may be strongest on a duct panel, floor, platform, or casing section rather than directly at the motor or bearing.
How to check: Compare vibration at the fan base, casing, bearing supports, and connected ducts. Look for loose connections and areas that move or vibrate visibly. Vibration measurements at multiple locations can help identify where the vibration is being amplified.
The remedy may involve reinforcing the support, correcting the mounting arrangement, adding suitable vibration isolation, or improving duct support. Simply tightening every connection without checking the structure can transfer vibration elsewhere.
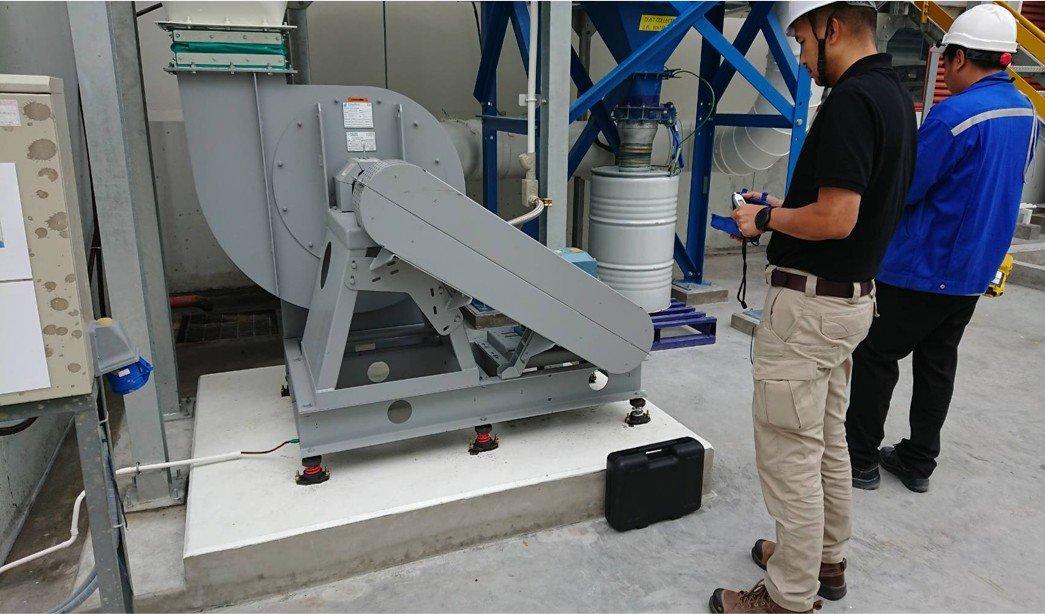
6. The Fan Is Operating Outside Its Intended Range
A centrifugal fan can become noisy when its operating point moves away from the intended range.
For example, excessive system resistance, incorrect damper adjustment, or unsuitable fan selection can cause unstable airflow. Under some conditions, the fan may approach a stall or unstable operating region, producing fluctuating pressure, pulsation, and noise.
Other possible causes include:
Fan speed higher than the specified value.
Incorrect impeller or drive configuration.
Unexpected changes to duct resistance.
Inlet or outlet restrictions.
Operation at an unsuitable airflow and pressure combination.
The sound may fluctuate rather than remain constant. Operators may notice a periodic surging or booming noise, sometimes accompanied by unstable airflow.
How to check: Compare actual fan speed, airflow, and static pressure with the approved operating conditions and fan performance curve. Check whether the system configuration has changed since commissioning.
Do not assume that closing a damper will always make the fan quieter. The effect depends on the fan design and where the damper is installed. If the fan is operating in an unstable region, the correct adjustment must be based on its performance characteristics.
7. How to Identify the Source of Excessive Fan Noise
The sound itself provides useful clues, but it is not enough to confirm a fault. Use the following table to guide the inspection.
| Noise characteristic | Possible source | What to inspect |
|---|---|---|
| Rushing or roaring air | Turbulence or high air velocity | Inlet, outlet, elbows, dampers, duct transitions |
| Continuous growling | Bearing wear or mechanical friction | Bearing housing, lubrication, shaft condition |
| Periodic knocking | Loose parts or rotating component contact | Impeller, fasteners, coupling, casing clearance |
| Belt squealing | Belt slip or incorrect tension | Belt condition, pulley alignment and tension |
| Low-frequency humming | Structural resonance or transmitted vibration | Base, support frame, ductwork and isolation |
| Fluctuating or pulsating sound | Unstable airflow or fan operating condition | Fan curve, system resistance, damper position |
| High-pitched whistling | Local air restriction or leakage | Gaps, dampers, narrow openings and duct joints |
These are diagnostic clues, not definitive fault identifications. Several faults can produce similar sounds, so confirm the suspected cause through inspection and measurement.
8. A Practical Inspection Sequence Before Replacing the Fan
When an industrial fan becomes unusually noisy, a step-by-step inspection is more effective than replacing components based on sound alone.
Step 1: Establish when the noise occurs.
Determine whether it starts immediately after startup, appears only at a particular speed, develops after the fan has warmed up, or changes with damper position. This helps narrow down whether the issue is related to the drive, bearings, airflow, or operating condition.
Step 2: Identify where the sound is strongest.
Compare the motor, bearing housings, fan casing, inlet, outlet, ductwork, and support structure. Use a suitable sound-level meter or vibration instrument if available.
Step 3: Inspect accessible external components.
After isolating the equipment, check belts, pulleys, fasteners, guards, access panels, and duct connections. Look for signs of rubbing, looseness, and physical damage.
Step 4: Inspect the impeller and bearings.
Check for material build-up, corrosion, blade damage, bearing wear, and lubrication problems. Internal inspection must follow the manufacturer's isolation and access procedures.
Step 5: Verify the operating condition.
Compare fan speed, airflow, static pressure, and damper settings with the intended operating point. Check whether any ductwork or process changes have altered the system.
Step 6: Correct the identified cause and verify the result.
After repair or adjustment, repeat the relevant noise and vibration checks under comparable operating conditions. Record the readings so that future changes can be identified.
If the noise is accompanied by severe vibration, scraping, smoke, a burning smell, or rapidly increasing bearing temperature, stop the fan and arrange an appropriate inspection rather than continuing operation.
9. How to Reduce Industrial Fan Noise During Selection and Installation
Noise control is easier when it is considered before the fan is installed.
For a new industrial ventilation or exhaust system, evaluate the required airflow and static pressure together with the fan's sound data. A fan that is oversized, undersized, or operating far from its suitable range may create unnecessary noise and energy consumption.
Installation design also matters. Provide appropriate inlet and outlet connections, avoid abrupt transitions close to the fan, support ductwork independently where necessary, and select suitable vibration isolation for the equipment and structure.
Where noise remains a concern after the mechanical and aerodynamic conditions have been corrected, acoustic measures such as duct silencers, sound enclosures, and acoustic lining may be appropriate. Their selection should account for airflow resistance, maintenance access, temperature, and the frequency range of the noise.
Conclusion
Excessive industrial fan noise can originate from airflow turbulence, impeller imbalance, bearing wear, drive problems, structural resonance, or an unsuitable operating point. The same symptom can have very different causes, so the correct solution depends on identifying the source.
For maintenance teams, the most useful starting point is to determine whether the noise is aerodynamic, mechanical, or structural. For equipment buyers, fan selection and installation conditions should be considered together rather than treating noise as a problem that can always be solved after installation.
At Wuxi JN Fan Factory, selecting a centrifugal fan for an industrial application involves considering airflow, static pressure, operating speed, drive arrangement, and installation conditions. Sharing the required operating data and site layout helps establish a fan configuration that meets the process requirements without creating avoidable noise and vibration.


