What is the installation process for a solar - powered roof fan?
Jul 03, 2025
Hey there! As a supplier of roof fans, I often get asked about the installation process for solar - powered roof fans. So, I thought I'd break it down for you in this blog post.
Why Choose a Solar - Powered Roof Fan?
First off, let's talk about why solar - powered roof fans are a great choice. They're eco - friendly, using the sun's energy to power the fan, which means you'll save on electricity bills in the long run. They also help to ventilate your attic or building effectively, reducing heat buildup and preventing moisture issues.
Tools and Materials You'll Need
Before you start the installation, you'll need to gather a few tools and materials. Here's a quick list:
- A solar - powered roof fan kit (obviously!)
- Measuring tape
- Drill with appropriate bits
- Screwdriver
- Sealant
- Roofing nails or screws
- Ladder
Step 1: Choose the Right Location
The first step in installing a solar - powered roof fan is to pick the right spot on your roof. You want to choose an area that gets plenty of sunlight throughout the day. A south - facing or west - facing part of the roof is usually ideal. Also, make sure there are no obstructions like trees or other buildings that could block the sun.
Another important thing to consider is the ventilation needs of the space below. You'll want to place the fan in a location that allows for the best air circulation. For example, if you're ventilating an attic, try to position the fan near the peak of the roof.
Step 2: Measure and Mark
Once you've found the perfect location, use your measuring tape to measure the area where the fan will be installed. Most solar - powered roof fans come with a template that you can use to mark the cutout on the roof. Place the template on the roof and trace around it with a pencil. Make sure the markings are clear and accurate.
Step 3: Cut the Hole
Now it's time to cut the hole in the roof. Use a drill to make a small pilot hole at one of the corners of the marked area. Then, use a jigsaw or a reciprocating saw to cut along the marked lines. Be very careful when cutting, as you don't want to damage the roof or the surrounding area. Wear safety goggles and gloves to protect yourself from any debris.
Step 4: Install the Flashing
After cutting the hole, you'll need to install the flashing. The flashing is a waterproof barrier that prevents water from leaking into the building through the hole. Apply a bead of sealant around the edge of the hole, then place the flashing over the hole and press it down firmly. Use roofing nails or screws to secure the flashing to the roof. Make sure the flashing is properly sealed and there are no gaps.
Step 5: Mount the Fan
Next, it's time to mount the solar - powered roof fan. Carefully lower the fan into the hole in the roof. Align the fan with the flashing and use the provided screws to attach the fan to the flashing. Make sure the fan is level and secure.
Step 6: Connect the Solar Panel
The solar panel is what powers the fan, so it's an important part of the installation. Most solar - powered roof fans come with a pre - wired solar panel. Place the solar panel in a location on the roof where it will receive maximum sunlight. Connect the wires from the solar panel to the fan according to the manufacturer's instructions. Make sure the connections are tight and secure to prevent any electrical issues.
Step 7: Test the Fan
Once the fan is installed and the solar panel is connected, it's time to test the fan. On a sunny day, turn on the fan (if there's an on/off switch) and see if it starts working. You should feel air being drawn out of the attic or the building. If the fan doesn't work, double - check the connections and make sure the solar panel is getting enough sunlight.
Different Types of Roof Fans
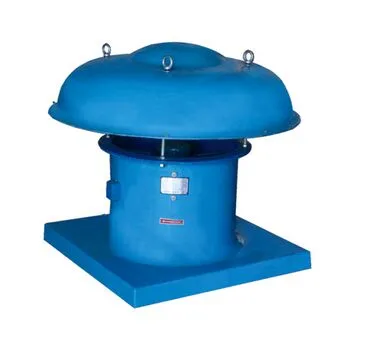
At our company, we offer a variety of roof fans to meet different needs. For example, if you're looking for a fan for a factory, check out our Industrial Centrifugal Roof Exhaust Fan Ventilator for Factory. It's designed to handle large - scale ventilation needs.
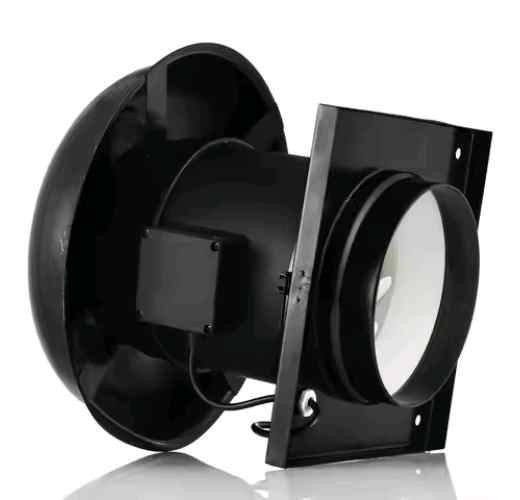
If you need a more compact option, our Downblast Roof Exhaust Fan is a great choice. It's perfect for smaller buildings or areas where space is limited.
And for general industrial roof ventilation, our Industrial Roof Ventilation Electric Roof Fan is a reliable option. It provides efficient air circulation and helps to keep the building cool.
Maintenance Tips
To keep your solar - powered roof fan working properly, there are a few maintenance tips you should follow. Regularly clean the solar panel to remove any dirt or debris that could block the sunlight. Check the fan blades for any damage or wear and tear. Also, inspect the seals and connections to make sure they're still tight and waterproof.
Conclusion
Installing a solar - powered roof fan is a great way to improve the ventilation and energy efficiency of your building. By following these steps, you can have your fan up and running in no time. If you have any questions about the installation process or if you're interested in purchasing a roof fan, don't hesitate to reach out. We're here to help you make the right choice for your ventilation needs.
References
- Solar Roof Fan Installation Guides from Various Manufacturers
- Roofing and Ventilation Industry Publications